
Hello,
Today, we have a new challenge starting over at Moving Along With The Times with the theme “Ring ‘O Roses” – however, you can create a ring with any flower. This challenge lasts for a fortnight; so if you’d like to join in, make sure you enter your project before Wednesday 15th February at 6pm GMT.
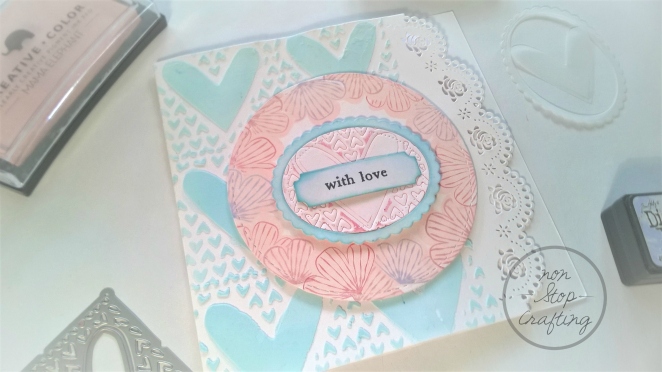
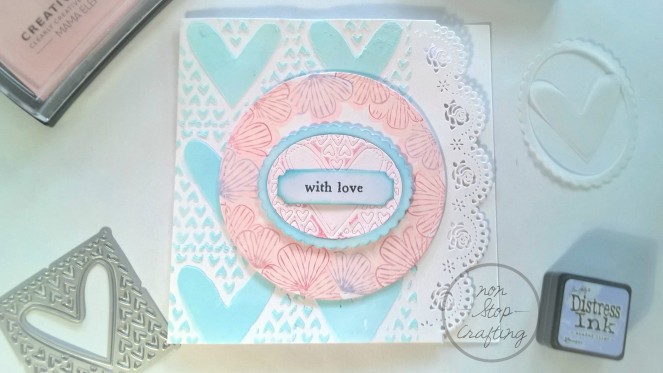
For my “Ring ‘O Roses”, I die cut the largest Lil’ Inkers Dual Stitched Mat Circle to make sure my flowers stayed in a ring! I then used My Favorite Things Sketched Blooms with Mama Elephant’s Blush ink as my base colour and then I used a variety of Hobby Craft Christmas Red with the Distress Inks Victorian Velvet and Shaded Lilac. I masked off each flower with a post it note as I went around do it looks like the flowers are closely grouped together.
Embossing Technique 1: Dry Embossing
I cut an oval with a scalloped frame from Avery Elle’s Sweet Scallop die set. On the oval, I took one of the Patchwork dies from Tonic Studios Everyday Squares set and put some Hobby Craft Christmas Red ink, mostly, over the cutting part of the die. I then placed the oval down onto the die and put some micropore over the edges to secure it. I ran it through my Sizzix Big Shot using the embossing setting with the Spellbinders Embossing Tan Mat which meant the die both left an indentation and transferred the ink.
Embossing Technique 2: Embossing Paste
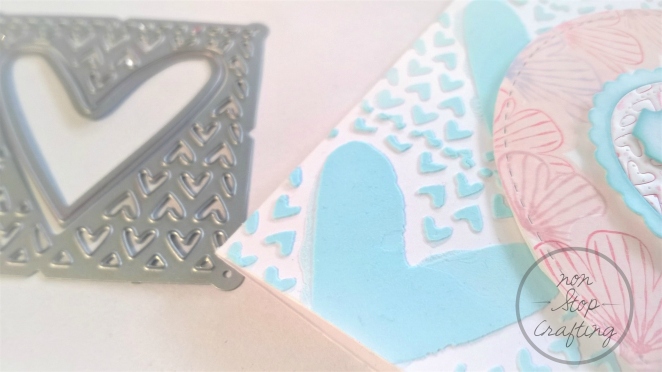
I used the same Tonic Studios die with a piece of acetate to create a stencil. I mixed some Winsor and Newton Modelling Paste (which is similar to Embossing Paste) with some of Faber Castell Cotton Candy Gelatos; I then used a pallet knife to smear it over the stencil directly onto my card base. I had to do each square separately, to allow drying time, however, the modelling paste is fairly drying. With the Modelling Paste being a ‘wet’ medium, it did warp the card slightly – however, it was only a little.
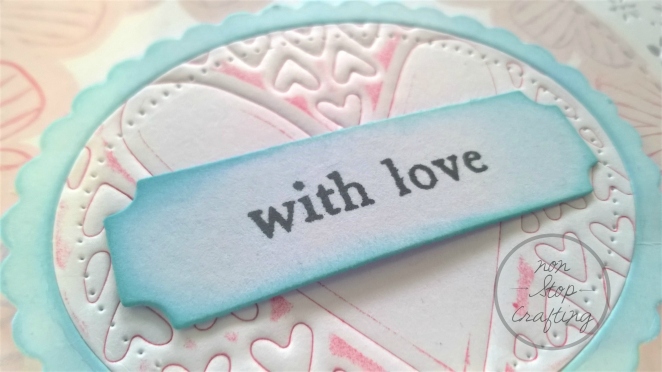
My sentiment banner is from Inspired By Stamping’s Fancy Label 3 set and I cut a “made with love” sentiment up from the Hero Arts Many Everyday Messages. I inked both the banner and scalloped frame with Mama Elephant’s Pacific Blue.
I would like to enter my card into the following challenges: mod Squad Challenge “Hearts and Flowers”, Try It On Tuesday “Hearts and Flowers”, Dream Valley Challenges “All About Love”, A Gem of a Challenge “Hearts and Flowers”, and Digi Designs Challenge Blog “All About Love”.
Thank you so much for visiting my blog – I hope you enjoyed reading!
Emma x

A wonderful entry to our hearts and flowers theme over at Try It On Tuesday! Thank you very much for joining us and the embossing tipps in your post!
♥♥♥
Susi
LikeLiked by 1 person
Thank you 🙂 Glad you liked the tips!
LikeLike
Such a pretty card. The colours are lovely and the textures just make me want to stroke it!
LikeLiked by 1 person
Thank you… I have to admit, I did keep running my fingers over the embossing! I’ve never really done a “textured” card like this before, so it was something new for me. Glad you liked the card 🙂
LikeLike
Gorgeous card! I love the soft colours and I love how you did the embossing, so pretty. Thanks so much for joining us at Di’s digi designs. Hope to see you again soon!
Hugs,
Larissa
LikeLiked by 1 person
So sweet card. Thank you for joining us at TioT.
LikeLiked by 1 person
So beautiful….Thanks for joining us at Di’s Digi Designs Challenge 🙂
Wendy xx
LikeLiked by 1 person
Thanks for sharing your beautiful card and the tutorial with us over at TioT this time. Hugs!
LikeLike
Such a pretty card Emma, thank you, xxxx
LikeLiked by 1 person
What a lovely card. And what a creative use of those dies!!! Great take on the challenge, thanks so much for playing along with us this week over at Mod Squad.
Judy – Challenge Host
LikeLiked by 1 person
Beautiful card. Thank you for joining us at TioT.
LikeLiked by 1 person
Hi Emma, beautiful colours on this card, loving the textures x
LikeLiked by 1 person